Saturday, September 25, 2021

The travels of River Cruise

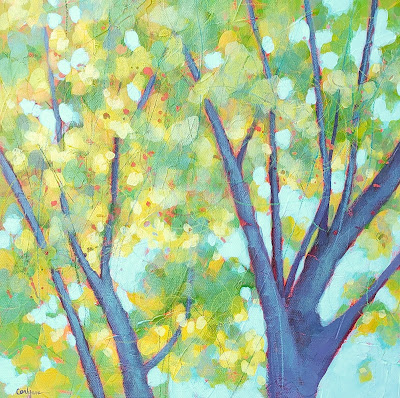
River Cruise

I had something interesting happen this week. Actually 2 somethings. The first one was about the above painting - River Cruise. I sold this painting last spring through my gallery rep in Tallahassee, Signature Art Gallery. When you sell a piece through a gallery you don't always know where that art ends up. You just assume it's hanging in a collector's home somewhere. 

Then you get an email from a previous collector who said they won it in an auction in Miami. Miami is a bit of a trip from Tallahassee. But, there it was, pictured in the email. This collector is local so River Cruise has done it's own traveling from here in the middle of the state, to the top of the state, then to the bottom of the state, and now back home in the middle again. That's cruising!

This collector wanted to know if I had some more work she could look at so of course I emailed images and she did buy more work. So this week I got to see how far my painting traveled, and I also got to send some more paintings out into the world and a new place to call home.


It was a good week. I hope yours was excellent too!

Tuesday, September 21, 2021

The only constant is change


This is my rotating art wall outside my studio at home. This is where paintings rest while waiting to go to their galleries or waiting to be shipped to collectors. When a spot opens up I fill it with another new piece. The arrangements don't always look great but the wall is constantly changing and the paintings rotating. 

The wall is pretty full right now. These are a few of the pieces I had hanging downtown at Gallery B. I brought all my work home because this wall isn't the only thing changing. I've decided it's time to leave Gallery B. Sometimes, the vision you have for something takes a different turn and becomes a different space than what you anticipated. And that's OK. We know that the only constant is change so it's just time to try something new. That's how it works on canvas too right? 

It was a fabulous 2+ years there and I made some wonderful friends. To my friends at Gallery B, I wish the very best. I hope they have tons of fun and success. And since I live literally a half mile from the gallery, I'll certainly be popping in to say hi on occasion.

There's a new thing in the future for me and I'm ready! I can't share it yet and it's probably going to take some time to get going but there is something new on the horizon. Meanwhile, I'm here, working at home in my studio, adding to my Etsy shop, and painting of course. So, if you want to know what this new thing is gonna be, and what I'll be up to in the meantime, sign up for the newsletter when the little window pops up.

 Till next time...


Thursday, September 16, 2021

5 tips to make studio painting a little easier.


1. Colored pencil friends... Do you have a bucket full of shorties? What do you do with all the little nubs of colored pencils when they're too short to put in the electric sharpener and too short to hold comfortably.  Pencil extenders are great, I use them all the time but even those don't let us use up the entire pencil. These little sticks of color are too expensive to just throw away. I learned a little tip from Ann Kullberg years ago when I took one of her portrait workshops (fabulous workshop btw). Take your little nub of a pencil and glue it end to end with a longer one of the same color - or a different color - it's up to you. Just put a dot of super glue on one of the ends and hold it for a few seconds until it holds. Leave the pencil sitting flat for a few minutes until it gets good and stuck. Now you can sharpen the nub all the way down until it's gone. Bonus: you have too sharpened ends on one pencil to color with.


2. Do you use photos for painting? If I'm not painting from life, I'm using my own photos. One way to break out of a color rut is to print your photos in black and white. When I use a color photo I tend to stick to the general color palette of the scene. When I print it in black and white I feel freer to experiment and play with different colors. 


3. Painters, here's an easy way to handle painting the edges of your small canvases without getting paint all over your table or your hands. You'll need a lazy susan. This paint covered one is a Wilton that's sold for cake decorating. Also get some oversized push pins.


Push one pin into each corner of the canvas on the back side. Flip it over, set it on the lazy susan and you can spin the base and paint the edges without having to hold the canvas up with your hands.


4. Take photos of your painting in progress and view them on your phone for a different perspective. Seeing it this way can give you fresh eyes and you may spot something you want to change. You can also change the photo to gray scale in your phone. This will help you see the value range you have in the piece and tell you if you need to darken or lighten certain areas.

5. Instead of starting your painting on a white canvas, tone the canvas with different colors. Try using complimentary colors for your base. For a landscape with lots of green, tone the canvas red. For a painting of a yellow flower, try a violet base. Bits of complimentary color peeking through can make your painting sing.

If you've learned some great little hacks for the studio, I'd love to hear about them. We could all use some help making tasks a bit easier. Share in the comments below.

Happy painting!

Tuesday, September 7, 2021

A new version of Spring


I did the above painting last year. It's called Spring. I had it hanging at Gallery B for a bit but I took it down because I don't want to display work that I'm unhappy with. It just never sat right with me. It's been hanging around my studio ever since. I kept looking at it, trying to figure out what I wanted to do. Then it dawned on me.

I decided to give it the same treatment I gave the one below... Assembly Required


The background of Assembly Required bothered me at first because it was too bright and bold. I didn't like the direction it was going so I switched gears, glazed the background with a mixture of white and acrylic medium to tone it down and then I added elements from nests that I have in the studio.

For Spring, I did the same. I mixed a glaze of white plus medium and applied it so it left a ghost of the image. On top, I added twigs, moss and a leaf I found in the yard. I actually put these bits of nature right on the canvas after it was dry, arranging them until I liked the design. Then I took a photo and printed it to use for a reference. Now the result is a "new" Spring! 

Spring
16x16x1.5

This new version says "Spring" to me much more than it did before. These are the building blocks that birds use every spring to build their nests. Now, how do I categorize it?? Is it a landscape? Is it a deconstructed nest? Is it abstract? Does it need a category? Really it only needs a category to figure out where to place it on my website so I guess for now, click to see it right here in the landscape category. 

Till next time.                                            


Friday, September 3, 2021

I'm finally adding to it


Happy Friday! Just popping in to share some info. Lately I've been ignoring my Etsy shop. Sometimes we get pulled in a million different directions with all the hats we wear and my poor little shop got left by the wayside. This morning I thought I'd better get back to it so I've added a couple of new listings and changed the pricing on some others - in the direction you would appreciate too. :)

I have a number of mini paintings that I'll be adding to the shop on a regular basis. They range in size from 2x2 inches to 4x4 inches. These teeny tiny little paintings make great ornaments for the holidays or accents on the mantle or bookshelf. They can also be hung on the wall to enjoy year round. The little bird nest in the top photo also has a ribbon hanger but I folded it down behind the painting so it can sit on the easel without being seen. If you want to add something extra to a gift for someone special, you could tie a mini to the bow on gift wrap. It's a gift on top of a gift! These are great because they're so versatile. Use them any way you want.

So click the link in this post or hop over to the sidebar and check out all the little gift ideas. And then I hope you have a fabulous long weekend.

Peace