Thursday, May 28, 2015

What's that saying? Do as I say........

I am constantly bugging my students about reference photos. Everyone who comes to class hears.... "Do you have your reference picture?" I'm pretty sure they get tired of hearing me ask that question but reference photos are a must. If you're going to paint something that you want to look realistic then you need to have a good reference. There are some folks in the world who think you're only a good artist if you can paint or draw anything out of your head without having to look at any references. I've heard people say this very thing and it's a very big misconception. Even the old masters used references. They might not have had a nifty DSLR camera or a phone that takes pictures but they used other methods including having models pose, setting up still lifes and dioramas in their studios or painting plein air.

So, after all that, after all the years of nagging people for good reference pics, did I take my own advice? I started a portrait commission recently. I got the reference photo via email and then printed it out. It was pretty blurry but I thought I could still work from it. Boy was I wrong. I got the basic shapes down (or so I thought) and proceeded to add color. The longer I worked the harder it became. I just couldn't tell what was going on. If you're working on something like a face you'd better have the detail info. Below is the photo I was trying to work with.


Check out this next photo..... what a difference a few more pixels make. Thankfully my client was able to get me a better image. So that's what this little guy's eyes look like! And there are pineapples on his hat- I had no idea what those orange blobs were.


When I went back to work on the portrait I had to re-draw portions of the hat and re-draw all the facial features. It certainly would have saved me time had I waited for a better picture to start with.


This is the portrait in progress. Lots to do yet and I still have a few adjustments to make on the face but it certainly is a lot easier to work with a good photo reference. Lesson learned: take my own damn advice! :)


Friday, May 15, 2015

Playing

So it's a couple of weeks after the workshop and I've been busy getting back into the routine of walking at the park, classes, portrait commissions and landscape painting. In between those things I get to play with little people like these 2 lovely ladies...


I mean, look at those faces- how can I resist? Sometimes I just have to put the brushes down and pick up a puppet or a book and snuggle with little girls on my lap.

Okay, back to art stuff.... while I was at the workshop in Live Oak I was introduced to a new paper (new to me anyway). It's called TerraSkin and one of the ladies taking the class was kind enough to bring a piece of it for me to play with. It intrigued me so when I got home I ordered a pad. What is TerraSkin? It's made from rocks. That alone was enough for me to try it. Here are some basics about it from their website

  • TerraSkin is a combination of mineral powder (>75%) and a small quantity (<25%) of non-toxic resin combined to create an environmentally friendly paper.
  • The production of TerraSkin requires no water, so the TerraSkin papermaking process incurs no water pollutants.
  • Used TerraSkin paper will start to degrade under the proper environmental conditions of high heat, moisture and UV light.
  • Most importantly, in producing TerraSkin, the harvesting of trees is unnecessary, thereby safeguarding the natural environment’s beauty and biodiversity for all living beings.
  • TerraSkin also has beautiful printing capabilities and a unique texture and feel. Because the paper is fiberless, it does not absorb ink like regular paper and also uses less ink than regular paper. Images stay much crisper and cleaner because the ink doesn’t bleed.
  • TerraSkin is water – resistant and inherently strong and durable.

It was originally formulated for commercial uses such as packaging, labels, banners, printing etc.... so there isn't anything about it's use for artists on the website but if you poke around online you can find info and videos about using this stone paper.

Here is my first time playing with TerraSkin.... I wanted to try mixed media with portrait work so I figured this paper would be ideal for it. It's very similar to Yupo paper but has a slight texture where Yupo is very slick. Because of the texture it accepts colored pencil pretty well. You can't build up as many layers as you can on Canson Mi-Teintes or watercolor paper but you can do some layering. I started this one by drawing the face first with colored pencils; I did a few layers of skin tones. Then I started playing with very loose washes of blue watercolor. The paper surface is slightly porous so it absorbs a little of the paint but a lot sits on the surface and takes a while to dry.


When it was dry I started playing with acrylic paint, some right from the tube and some watered down. I also sprayed it with water while the paint was still wet. I scratched into the paint with the handle end of the brush to make some marks and then I kept layering acrylic and watercolor. At one point I splattered the blue and then sprayed it to encourage it run across the face and then let the puddles dry where they were.


The background really looks a mess but it's fun to let loose and experiment. I can always go back into it and paint some more layers over it and change the look completely. I can definitely see playing with these techniques some more. If you work on paper and like playing with mixed media, give this paper a try.

Time to pick up a brush.... 


Monday, May 4, 2015

What's in Live Oak?


When I told someone I was going to do an art workshop in Live Oak they asked.... "there are enough people in Live Oak that would take an art workshop?? There's nothing in Live Oak!" Well, this past weekend I had the pleasure of going to Live Oak to teach a colored pencil portrait workshop and yes, there are artists there. In fact, there are lots of them and with quite a bit of talent! AND.... 6 people from Live Oak have been accepted to the upcoming CPSA International Exhibition in Atlanta this summer so I'd say Live Oak does have something good going on.


What a wonderful group of ladies. They were funny, kind, sweet, generous and like I said - amazingly talented. In fact a few of them had me wondering what in the world they were doing there. I want to take a class from them!


Cathy has such an intuitive way of working where she uses so much unusual color in her portraits. She is an inspiration to me!


Suzanne working on a large portrait of her daughter. I'm hoping she'll send me a photo of the finished piece.


Anda was just whipping out this portrait of her hubby. She's great at capturing light.


Marilyn's portrait of her little great-nephew is going to be a stunner.
 Can't wait to see it when it's finished.

If anyone ever asks you- what's in Live Oak? Tell them about all the fab colored pencil people who live there and tell them to get some fried chicken at the Dixie Grill.


Friday, April 24, 2015

Hanging on to winter


Fire and Ice
18x18

As I sit in my studio enjoying the air conditioning on a hot, Florida spring day, I'm still enamored with ice. I think I'm trying to hold off the inevitable - VERY hot summer days. This is the third ice painting so far, finished this one yesterday. There's more I want to do in my quest of hanging on to winter but for now I have to set the brushes aside and focus on prepping for a colored pencil portrait workshop I'm doing in Live Oak next week and then I have several portrait commissions to work on. It's good to be busy!

I love to see what other artists are doing. While I've been working at the easel I have my laptop open on the table so I can watch/listen to stuff while I paint. This week I've been re-watching the Work of Art reality show from Bravo. I found them on YouTube. I saw them when they were first aired but it's been a while. I loved watching the process of the artists. My only wish is that Bravo would make more seasons. It's very sad that they stopped after season 2.

So 2 questions for you..... What are you working on? (feel free to share pics) and Do you know of any good documentaries on art- preferably something on contemporary artists?

Back to work...... 
Have a great weekend!

Tuesday, April 14, 2015

Done!


Finished the latest ice painting this morning. I'm calling it Frozen, it's 18x18 in size. Next up.... I've been given some photos by one of my students and I can't wait to start the next one. I'm intrigued by these pictures- there are some interesting forms and patterns to play with. We'll see what happens.


Friday, April 10, 2015

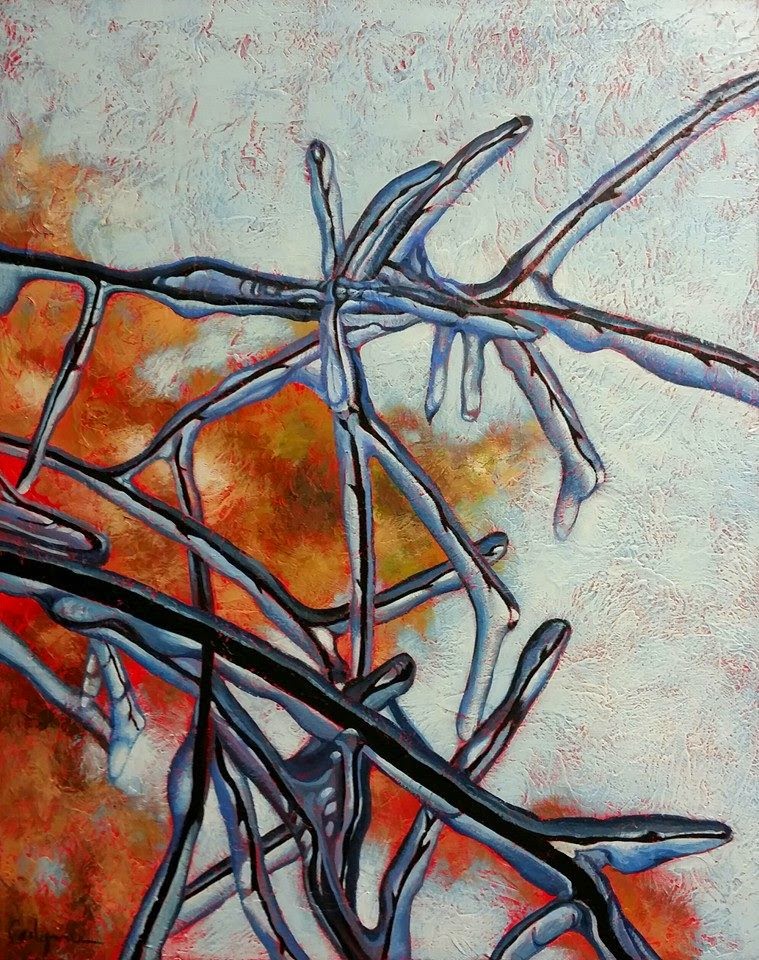
Ice Painting


Ice Storm
20x16

Just thought I'd share the work I'm doing at the moment. I've been pretty busy with Painting Party stuff along with some other projects but I had to try something different. I've been looking for some new inspiration and my daughter sent me some photos that she took up in GA this winter. They had an ice storm up there and she got some fabulous pictures of trees and leaves caught in the ice. I wanted to see how this kind of scene would work with my usual technique of texturing the canvas and using a hot red underpainting. The painting above is the first one and the one below is in progress. They're a lot of fun but definitely a challenge, especially when trying to decide how much of the texture to enhance and how much of the red color to let peek through. Getting a smooth, even line on that texture isn't easy either!

Back to it. Hope you've been having a creative week. :)


Saturday, March 21, 2015

The stages of Pouty Face

Many times when working on a portrait I post pictures of the piece in progress on my Facebook page. I've found that people really love to see the progression and the layers build up. I've noticed that artists and non-artists alike enjoy seeing how it works so here is the progression of colored pencil layers as I was working on the Pouty Face portrait I shared in the last blog post.


Here I've just got the basic outline in and I'm working out my palette while starting to get some darks blocked in.


You can see that little strip of paper on the side- that's where I test my colors. For this portrait I'm working on a dark blue Canson pastel paper. It's actually darker than it looks in the photos. When I took these pics I was just using my phone at the drawing board. The board is right in front of 2 windows so sometimes the colors shift depending on the time of day I took the picture.


So here I'm beginning to build up skin tones. Any time I'm working on colored paper I cut an extra strip of the same color paper to test the pencils on- especially for skin. On this paper I couldn't use any of my usual portrait colors that have yellow in them. You know what happens when you mix yellow and blue..... he didn't need to have green skin.


I used lots of peachy and orangey tones to work the skin. Surprisingly deco orange got used a lot. I hadn't considered it right away but it really worked.


In this pic the lips look a lot more orange than they really were. They were a bit of a challenge though to get them pink enough without them turning purple on the paper.


He's almost done here- just building up the background colors and the red of his shirt. I went back into the eyes to push the values a little more and then back into the hair to fill it out with more strands.


Pouty Face is done and Pouty Face happens to be my youngest grandson. He is quite the character so I'm sure I'll be doing more portraits with his very expressive self.